This design document serves to provide an overview of the DeCYFIR Add-on & App for Splunk.
DeCYFIR is a cloud-based threat discovery and cyber-intelligence platform, designed to defend organizations by uncovering attack surfaces, building digital risk profiles & using personalized insights to predict imminent attacks and decode cyber threats before a cyberattack hits.
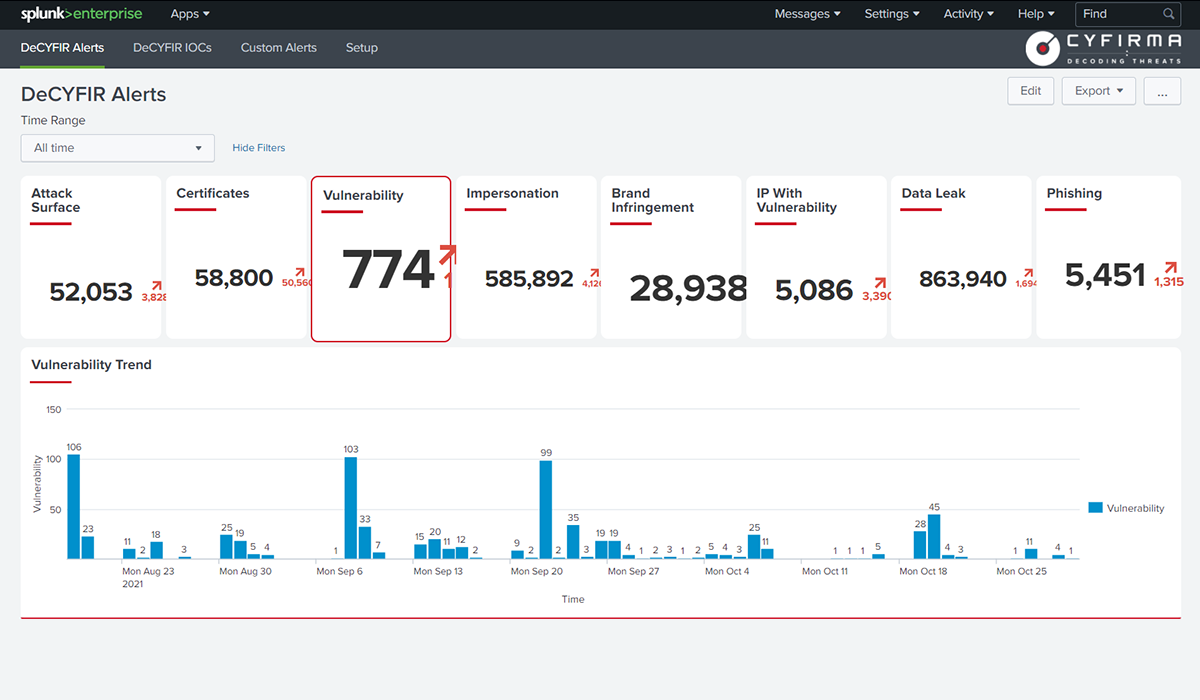
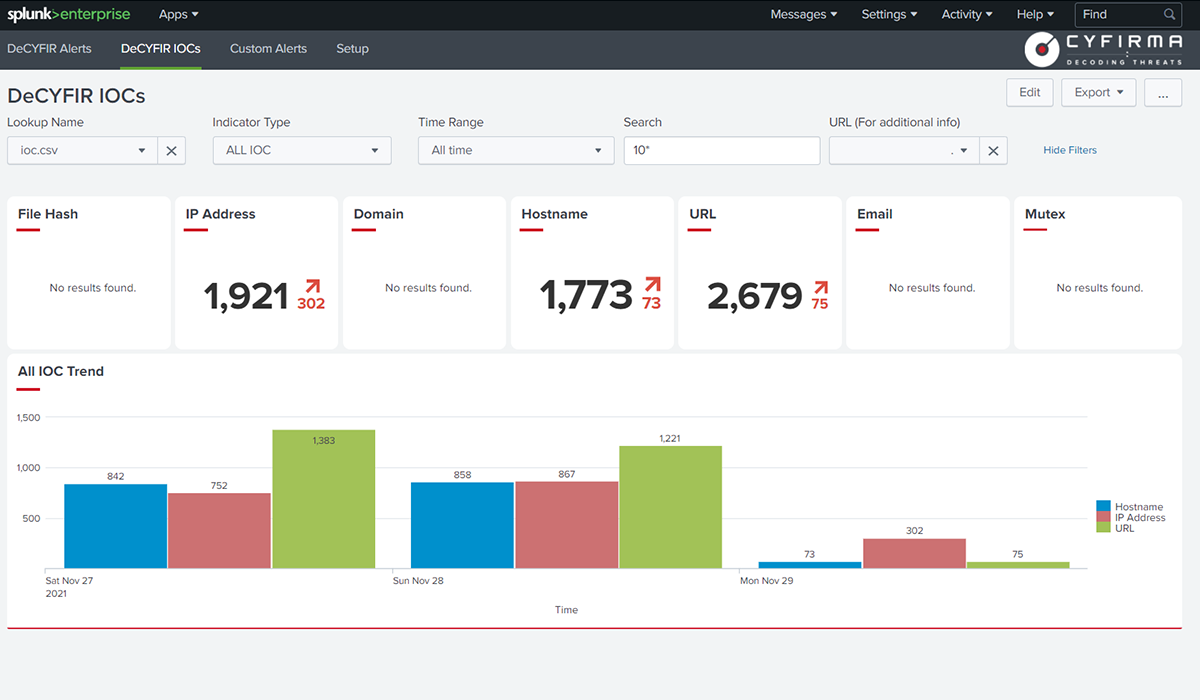
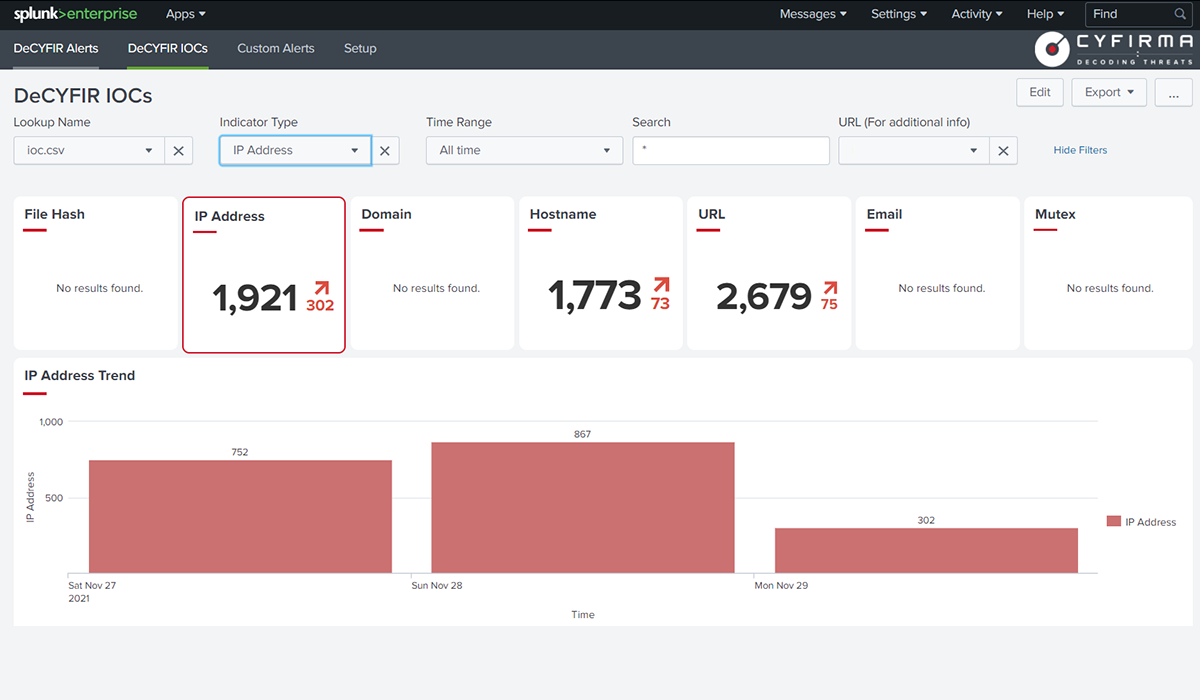
The Splunk add-on will help in collecting DeCYFIR alert events data using the events API and sending it to Splunk events. It will also ingest DeCYFIR IOC data as lookup data in Splunk Enterprise.
The Splunk app will have searches based on Alerts & IOC data. Dashboards are created based on Splunk searches.
To install the Splunk enterprise, follow this manual Splunk Installation Manual.
Login to Splunk Enterprise.
Click on Apps > Search for App.
Search for “CYFIRMA DeCYFIR Add-on for SPLUNK.
Search for “CYFIRMA DeCYFIR app for SPLUNK.
Search for Apps & enter the app name to search for.
Check the prerequisites and details.
Click on Install.
After installation of DeCYFIR Add-on, set up the account by following the steps below:
On the left panel of Splunk Enterprise click on the TA-CIP.
Click on the Configuration tab.
In the Accounts Sub tab click on Add.
Give a unique name to the configuration and add the URL of the product & API key generated from the Product.
Click on Add.
To set up the proxy for API data collection, follow the steps here:
Go to Add-on by clicking on DeCYFIR from the left bar.
Click on the Configuration tab.
Click on the Proxy tab under the configuration tab.
Fill in all the necessary details.
Click on Save.
To log API data collection, follow the steps here:
Go to Add-on by clicking on DeCYFIR Add-on from the left bar.
Click on the Configuration tab.
Click on the Logging tab under the configuration tab.
Select the log level. Available log levels are Debug, Info, Warning, Error and Critical.
Click on Save.
To set up additional parameters for API calls and retry mechanism, follow the steps here:
Go to Add-on by clicking on DeCYFIR Add-on from the left bar.
Click on the Configuration tab.
Click on the Add-on Settings tab under the configuration tab.
Number of Retries.
Sleep Time.
Page Size.
Click on Save.
To create input and API data collection, the steps are as follow:
Go to Add-on by clicking on DeCYFIR Add-On for Splunk from the left bar.
Click on the Inputs tab.
Click on Create New Input -> Select DeCYFIR Alerts.
Fill in all the necessary details.
Click on Save.
To create input and collection of API data, follow the below-mentioned steps:
Go to Add-on by clicking on DeCYFIR Add-On for Splunk from the left bar.
Click on the Inputs tab.
Click on Create New Input -> Select DeCYFIR IOC.
Fill in all the necessary details.
Click on Save.
Once the app is installed, it would need to be setup. To complete the setup, please follow the steps here:
Go to DeCYFIR App for Splunk.
Click on “Continue to app setup page”.
Enter the URL for CYFIRMA. Example: decyfir.cyfirma.com.
Enter the API Key for the above URL.
Click Save.
Your iFrame Code
This site is registered on wpml.org as a development site. Switch to a production site key to remove this banner.